The Ultimate Guide to Joining Laminate Benchtops in Your Kitchen
Your benchtop is one of the focal points in your kitchen—and a part of the home you’ll always use. From preparing ingredients to eating quick meals to entertaining guests, you’ll spend much time looking and working on these surfaces. That’s why you must get it right when joining your laminate benchtops.
Laminate countertops are durable, affordable, and nice to look at. However, they can be a bit tricky to install, which is where this guide comes in to help you.
Today, we’ll walk you through the step-by-step process of how to join laminate benchtops. Whether you’re building your kitchen from the ground up or working on kitchen renovations, this article will help you do it like a pro!
Before you start: Gather the tools for installing and joining your benchtops
These are the tools and materials you’ll need to start cutting benchtops:
- Ear muffs, mask, and safety goggles
- Template boards
- Jigsaw
- Sanding disc or sandpaper
- Clamp
- Pencil and ruler
- Straight edge Handsaw, table saw, or laminate cutting tool
- Contact cement or wood glue
- Benchtop connectors
- Small paintbrush
- Router
- Drill and drill bits
- Screws
- Laminate flushing trim bit
- Chisel and cleaning agent 1.3 cm wooden dowels
- Tin snips
- Sealant and caulking gun
- Aluminium heat conductive tape (if necessary)
Steps to joining laminate kitchen benchtops
Step 1: Make and cut out the laminate templates
First off, put on your safety equipment. These protect you while working with power tools and materials that may shed dust and debris.
Cutting and joining laminate benchtops starts with some templates. Use the paper templates provided by the shop and trace them using the template board. Then, grab your jigsaw and cut out the template board. Finally, smoothen the template board using a sanding disc or sandpaper. Then, place the template board where the cut-out laminate is needed and clamp it down.
Step 2: Cut out the laminate strips
Once you’re happy with your templates and how they fit, it’s time to measure the laminate pieces. Make sure they’re around 3cm larger than what is needed.
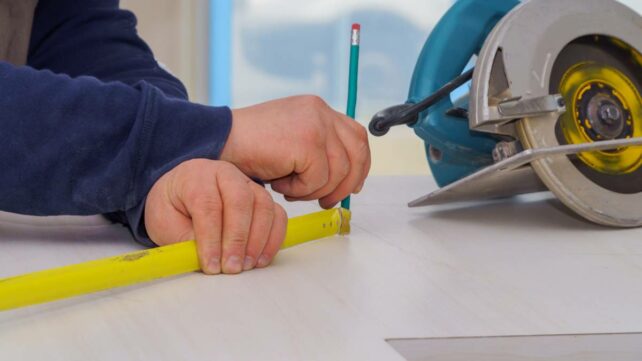
After that, get a straightedge to mark your cutting lines. Remember: measure twice, cut once! Cut the laminate pieces using a handsaw or table saw.
Step 3: Install the sink and appliance fixing blocks
Ensure that no screws are inserted in the benchtops before you install any sink or appliance. Instead, fasteners should be inserted in the wood subframe of your countertop.
Next, install your sink based on the manufacturer’s instructions. You may need a kitchen renovation expert to help with this.
Step 4: Mark the adjoining sections
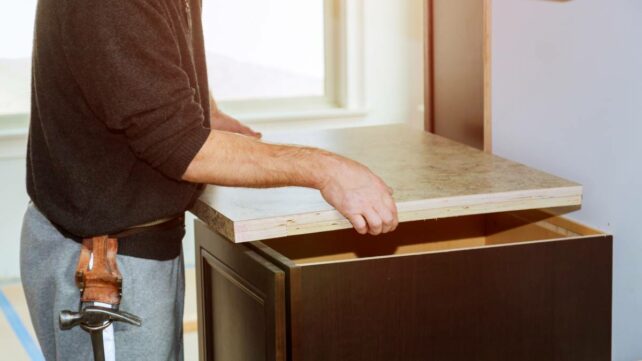
It’s time to start marking. Lay the laminate bench sections on top of the cabinets and mark where the sections join up. Then, flip the pieces and match up the marks. These marks will be your drill points.
Drill holes along the underside of your laminate benchtop, then use a handsaw to cut slits from the holes to the edge of each benchtop piece.
Step 5: Preparing the cabinets
Next, install the brackets for your bench into the top centre of the back panel of each cabinet. After that, prepare guide holes by drilling into the horizontal braces on the front of the cabinets.
Step 6: Joining kitchen benchtop sections together
There are two ways to do this: using benchtop connectors or adhesive.
With benchtop connectors
- First, place the laminate strips on the right side of the cabinets. Put wood glue or contact cement on the joints, then install the benchtop connectors.
- If you want to screw the benchtop into the cabinet, drill screw holes in the cabinets and benchtop. You can also opt for adhesive instead of screws.
With adhesive
- Clean the benchtop’s end pieces. Using a small paintbrush, apply contact cement or wood glue to the laminate strips’ ends and end edges of the underlayment.
- Wait 5-10 minutes or until the glue is tacky. Press the end strips down and tap the edges with scrap wood or a hammer to keep them secure.
- Once the glue is dry, use a chisel and cleaning agent to scrape the excess adhesive. The glue will continue to ooze for 30 minutes, so clean the edges thoroughly during this window before it hardens.
- Trim the excess laminate. You can do this with a router and a laminate flushing trim bit.
- Let the glued benchtop set for at least two hours or overnight for best results.
Step 7: Attaching the laminate benchtop to the cabinet
With screws
- Using the pre-drilled holes in the cabinets, screw the benchtop into place securely.
With adhesive
- Use a paintbrush to apply contact cement or wood glue to the back of the laminate sheet and the top of the underlayment. Again, wait 5-10 minutes or until the adhesive is tacky.
- Position 1.3 cm wooden dowels along the countertop, with 15-30 centimetre gaps in between. Place the laminate on top of the dowels with the back edge flush with the underlayment. The front and sides of the laminate should overlap the front and side edges of the underlayment.
- Remove the dowels one at a time, starting with the one in the middle. Let the laminate touch the surface of the underlayment and press it in gently.
- Using scrap wood and a rag, press down into the centre of the laminate. Work from the middle outwards.
Step 8: Trimming and finishing
The next step in the joining process is to trim the excess laminate. Once the wood glue is dry, use your router and laminate flush trimming bit to cut off the excess laminate. You can also use tin snips to cut off excess laminate in hard-to-reach places.
Finish the edges by using a smooth plastic laminate file. Pull downwards to avoid damaging the laminate. Use a rag and cleaning agent to remove excess adhesive.
Step 9: Joining and filling the seams
Joining benchtops also involves filling in seal joints. You can do this by attaching the countertop to the cabinet with screws.
Next, use silicone sealant to seal the joint between the countertop and the cabinet. Get a caulking gun and apply a bead of sealant at a 45-degree angle. Smooth it down as you go. If your benchtop is against a backsplash or wall, apply silicone sealant on the seam as well.
Practical tips when combining laminate benchtops
Joining kitchen benchtops requires precision and a steady hand. Here are some tips that will help you through your DIY project:
- Ensure the laminate joins won’t interfere with your sink or garbage disposal installation.
- Avoid placing metal equipment on the laminate to avoid scratching it.
- Don’t insert screws directly into the benchtop.
- Benchtops along walls should be around 600 to 650 mm in depth so that you can comfortably reach across them. Depending on how many people will be using the countertop simultaneously, they can be 600 to 1500 mm long.
- If you’re designing custom benchtops, consider accessibility for persons with disabilities or those with mobility concerns, such as the elderly. When considering wheelchair access, your benchtop height should be from 830 to 870 mm, and the depth should be around 600 mm.
- The Building Code of Australia requires laminate bench tops to be joined when the cabinets underneath change direction. The joints must also be sealed to prevent food and waste from getting in. This is for both hygienic reasons and to maintain the structural integrity of the substrate material.
Expand your kitchen for full functionality
Now that you know how to join benchtops, you can spruce up your kitchen with a beautiful, functional countertop. Unsure about tackling this project on your own? You can consult a kitchen renovator for prices and help with this kitchen renovation project.
Working with local experts can also help you with other kitchen improvement tasks, such as painting your kitchen cabinets.
FAQs on joining laminate benchtops
How do you cut a laminate benchtop without chipping?
You’ll need the right worktable. A steady surface can help support you, your tools, and the laminate during cutting. Use a good circular saw at a low cutting speed. Finally, technique matters. Experts recommend cutting from back to front (with the cut coming towards you) and the laminated side down. Try these tips the next time you cut laminate and see for yourself!
Will Bunnings cut benchtops to size?
Yes, they can cut benchtops to size. You can inquire about their benchtop installation service to create a custom counter for your home.
How are kitchen benches attached?
There are three types of joins for laminated kitchen benches. These are determined by the way the strips are cut before joining. These are:
- Mason’s mitre – These laminate tops are joined at a 90-degree angle.
- Angled mitre – These pieces could be joined at varying angles.
- Butt join – These two laminate strips could be combined in a straight run.
How much does kitchen benchtop installation cost?
Kitchen benchtop installation can cost between $200 and $2,000 per square meter, depending on factors like materials used and design complexity. You can learn more about it by consulting a benchtop installer near you.


